By Glyf
Excel & CSV Export
You did the hard part. Receipts uploaded, data extracted, fields reviewed. Now you need that data somewhere useful: a spreadsheet, your accounting software, a tax folder you can hand to your bookkeeper and never think about again.
That's where export picks up. We give you two structured formats to export receipt data to Excel or CSV, both built from the same extracted fields and shaped for different workflows. No copy-pasting from PDFs. No retyping vendor names into a spreadsheet row by row.
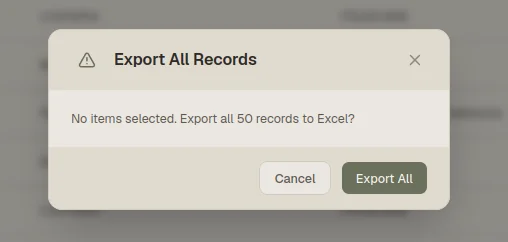
Export Receipt Data to Excel
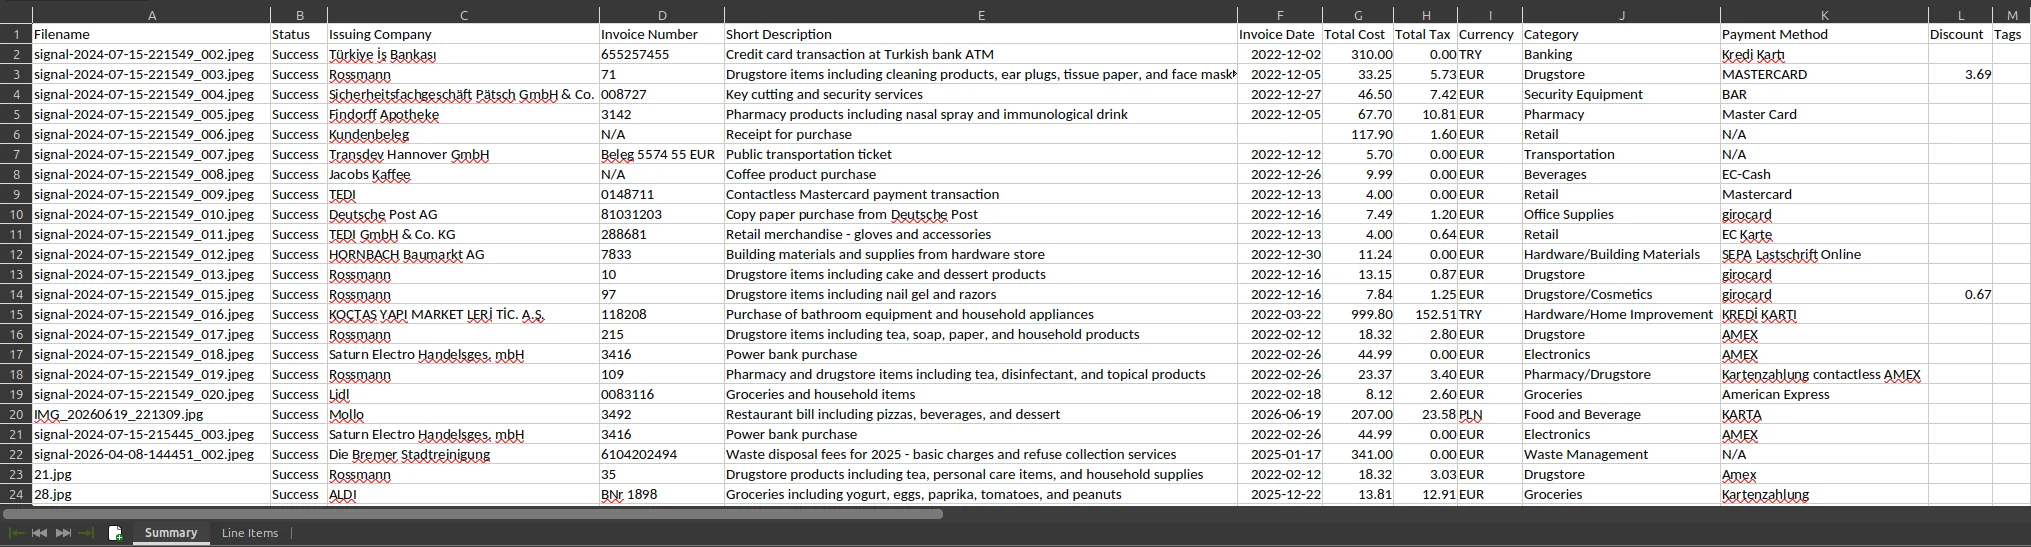
The Excel export creates a two-sheet workbook designed to match how most people actually use invoice data.
The first sheet (Summary) puts one row per invoice with all header-level fields: vendor, date, total, currency, tax breakdown, invoice number, category, tags, and description. This is your bird's-eye view. Sort by date for monthly reporting, filter by vendor for supplier reconciliation, or hand the whole sheet to your accountant at tax time.
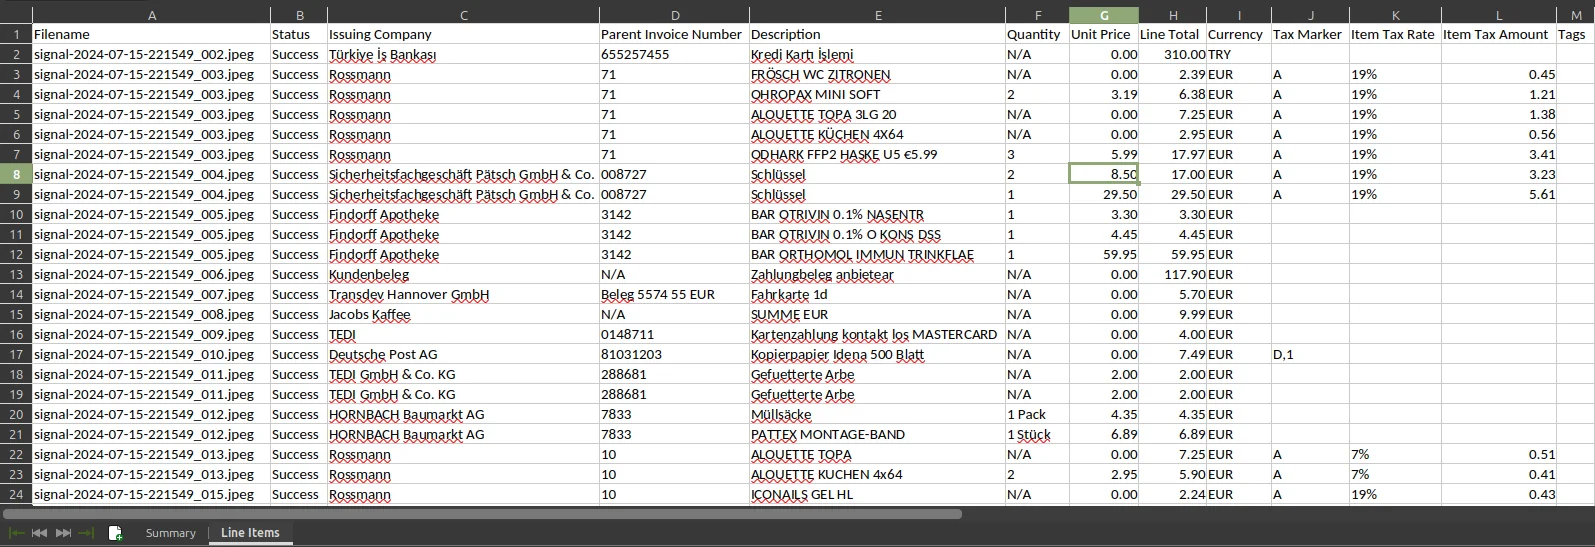
The second sheet (Line Items) breaks out every individual line item with its parent invoice reference, description, quantity, unit price, and line total. Two sheets because header data and line-level data serve different purposes. Your tax preparer wants the summary. Your expense auditor needs line-level detail. Both get what they need from a single file without reformatting.
Tags you've applied in Glyf carry over into the Excel export too. If you've tagged receipts as "Travel" or "Office Supplies," those categories appear as columns. Worth applying tags before you hit export. Saves cleanup on the other side. For more on shaping your spreadsheet output, check our guide on export templates.
Export Invoice Data to CSV
CSV is the universal format. Every accounting tool, bookkeeping app, and spreadsheet program on the planet reads it. Our CSV export is flat: one row per line item, UTF-8 encoded, compatible with Windows, Mac, and anything else that opens text files.
The tradeoff is structure. You get one flat table instead of the two-sheet layout Excel provides. But for piping data into QuickBooks, Xero, DATEV, or any import tool that expects a CSV, this is the format you want. Clean columns, no formatting surprises, ready to map to your chart of accounts.
Need help deciding which columns matter most for your workflow? Check our column recommendations guide.
What Gets Exported
Every export (Excel or CSV) pulls from the same 12 fields our Data Extraction Engine captures per document:
- Invoice Number and Date
- Issuing Company
- Category and Short Description
- Total Cost and Currency
- Primary Tax Rate
- Tax Details (rate and amount per tax type)
- Line Items (description, quantity, unit price, line total)
- Payment Method and Discount Amount
Fields you've edited in the Invoice Drawer export with your corrections, not the original extraction values. What you review is what you get.
Here's the thing most export tools miss: line items. Basic tools often stop at header fields: vendor, date, total. We extract the full breakdown when line items are present on the document, so your spreadsheet reflects what's actually on the receipt, not just a single-line summary of it.
Filtering Before You Export
You don't have to export everything at once. Filter your history by date range, vendor, amount, tag, or currency, then export just the filtered set. Useful when you're pulling together a monthly expense report or isolating invoices for a specific project.
Mixed currencies need a heads-up. The export doesn't convert or separate currencies automatically, so filter by currency before exporting to keep your spreadsheets clean and single-denomination. For tips on arranging your export view before downloading, see our export layouts guide.
Working on a subset? Select specific records from your filtered results and export only those. More on that in our guide to exporting filtered results.
Keeping Track of Exports
After every export, each record gets a "Last Exported" timestamp in your history table. No second-guessing whether last month's receipts made it into the report.
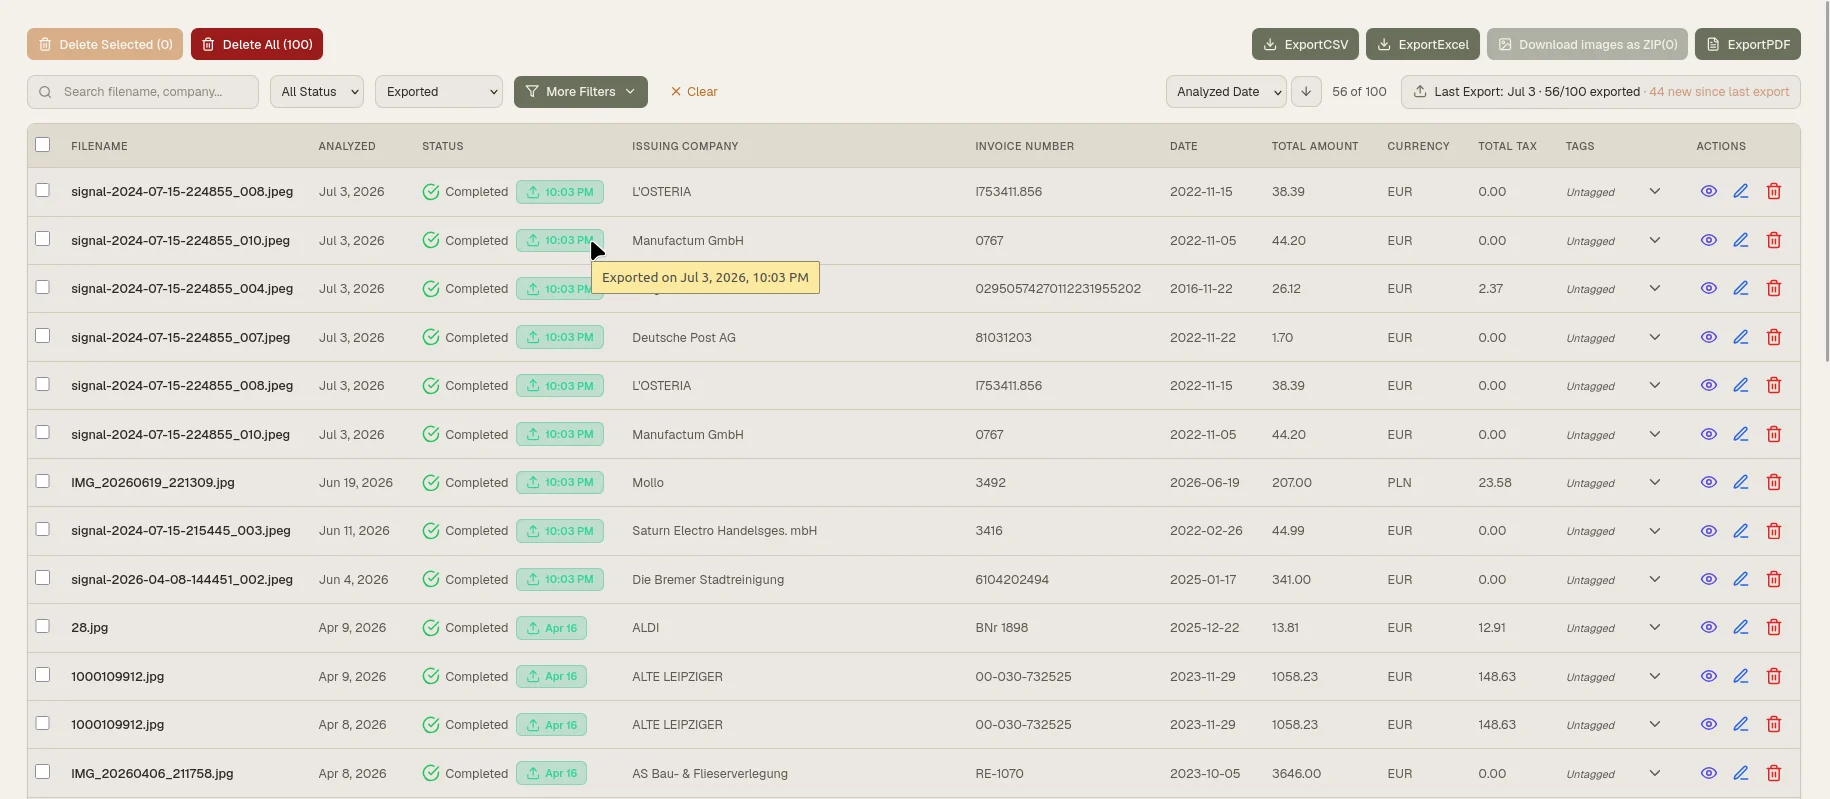
This matters most for recurring workflows. If you export weekly for bookkeeping, the timestamp tells you exactly where you left off. Filter by "Never Exported" to grab only what's new: no duplicates, no gaps.
Quality Checks Before Exporting
Extraction results depend on document quality. A crisp digital PDF exports cleanly. A crumpled receipt photo might need a quick review first.
We flag documents as "Needs Attention" when critical fields come back empty: things like total cost, currency, or vendor name. Clear that queue before exporting so you don't end up with blank cells in your spreadsheet. Open the Invoice Drawer, fill in what's missing, save, and export with confidence.
Spot-checking a few records is good practice too, especially for handwritten receipts or unusual invoice formats. Five minutes of review can save an hour of spreadsheet cleanup later.
Beyond Spreadsheets
Excel and CSV aren't the only export options. We also support document images as a ZIP archive and formatted PDF reports: a summary table on page one, followed by document images in a grid layout. But for getting structured invoice data into your accounting workflow, spreadsheet exports are the workhorses.
Getting Started
Export is available on every plan, including the free trial. Upload your receipts and invoices, let us extract the data, review the results, and export to Excel or CSV when you're ready. Fifteen free scans to see how the whole flow works. No credit card needed.